Are you a Non-Resident Indian (NRI) living in the USA, Canada, Australia, or Europe, and your Indian passport is nearing its expiry date? Renewing your passport from abroad might seem like a daunting task, but with the right guidance, it can be a smooth and stress-free process.
An expired passport can lead to significant travel difficulties, legal complications, and even hinder access to essential services. Don’t wait until the last minute! This comprehensive guide will walk you through every step of renewing your Indian passport while living overseas, ensuring you’re always travel-ready.
Why is Timely Passport Renewal Crucial for NRIs?
For NRIs, an up-to-date Indian passport is more than just a travel document; it’s a primary form of identification, essential for banking, OCI applications, visa services, and proving your Indian nationality abroad. Delays can lead to:
- Inability to travel to India or other countries.
- Difficulties with visa applications for your country of residence.
- Challenges in accessing financial services.
- Potential penalties or complications with local authorities.
Indian Passport Renewal: Step-by-Step Guide
The process of Indian Passport Renewal generally involves online application submission, document preparation, and submission to the respective Indian Embassy/Consulate or its authorized service provider (like VFS Global). Here’s a breakdown:
Step 1: Determine Your Jurisdiction and Service Provider
First, identify the correct Indian Embassy or Consulate that serves your residential address. Most Indian missions abroad outsource passport services to authorized agencies like VFS Global. Check their official website for your specific location (e.g., VFS Global USA, VFS Global Canada, etc.).
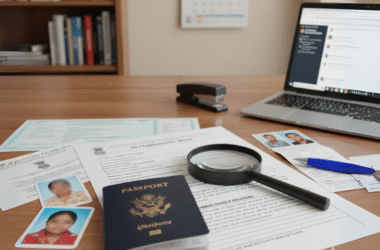
Step 2: Gather Required Documents
This is the most critical step. While requirements can vary slightly by country, general documents include:
- Current/Expired Original Indian Passport: Your existing passport is essential.
- Photographs: Recent passport-sized photographs meeting specific Indian government specifications (usually 2×2 inches, white background, matte finish).
- Proof of Current Address Abroad: Utility bills, driver’s license, or bank statements are commonly accepted.
- Proof of Indian Address (Optional but Recommended): A utility bill or Aadhar card from India can be helpful.
- Self-Attested Photocopies: Photocopies of relevant passport pages and supporting documents.
- Application Form: The online application form printout.
- Annexures/Affidavits: Depending on your specific case (e.g., name change, lost passport, minor passport), you might need Annexure E, an affidavit for a change in appearance, etc.
Step 3: Complete the Online Application Form
Visit the official Indian Passport Seva portal to fill out the online application form.
- Register and create an account.
- Select “Apply for Ordinary Passport” and then “Re-issue of Passport.”
- Carefully fill in all details as they appear on your current passport.
- Save and print the application form once completed. Note down your Application Reference Number (ARN).
Step 4: Schedule an Appointment & Pay Fees
Go to your designated service provider’s (e.g., VFS Global) website.
- Register on their portal.
- Link your ARN to their system.
- Schedule an appointment for document submission.
- Pay the passport renewal fees and any service charges online. Print the payment receipt.
Step 5: Submit Your Documents
On your scheduled appointment date, visit the service center with all your original documents, self-attested photocopies, printed application form, and payment receipt. Ensure everything is neatly organized.
- Documents will be verified.
- Biometrics (if required) will be taken.
- You will receive an acknowledgment receipt.
Step 6: Track Your Application Status
You can track the status of your application online using the ARN on the Passport Seva portal and/or the reference number provided by your service provider. This allows you to monitor its progress from submission to dispatch.
Step 7: Receive Your New Passport
Once processed, your new Indian passport will be dispatched via courier to your registered address. This typically takes a few weeks, but processing times can vary.
Common Pitfalls to Avoid
- Incorrect Photos: Ensure your photos meet exact specifications. This is a common reason for rejection.
- Missing or Unclear Documents: Double-check your checklist. Photocopies must be legible.
- Signature Mismatches: Ensure your signature on the application matches your previous passport and other documents.
- Jurisdiction Errors: Applying to the wrong consulate/embassy can cause significant delays.
- Last-Minute Applications: Apply well in advance (at least 6-9 months) of your passport’s expiry date.
Simplify Your Passport Renewal with Documitra
Navigating these steps can be complex, especially with busy schedules and varying regional requirements. This is where Documitra steps in. We specialize in assisting NRIs with their Indian passport renewal applications in the USA, Canada, Australia, and Europe.
Our expert team provides:
- Personalized Document Checklists: Ensuring you have everything you need.
- Form Filling Assistance: Guiding you through the online application to avoid errors.
- Application Review: Catching common mistakes before submission.
- Transparent Process: Keeping you informed at every stage.
Don’t let bureaucracy stand between you and your updated passport. Let Documitra handle the complexities so you can focus on what matters most.
Visit Documitra Today! or Contact Us for expert assistance.